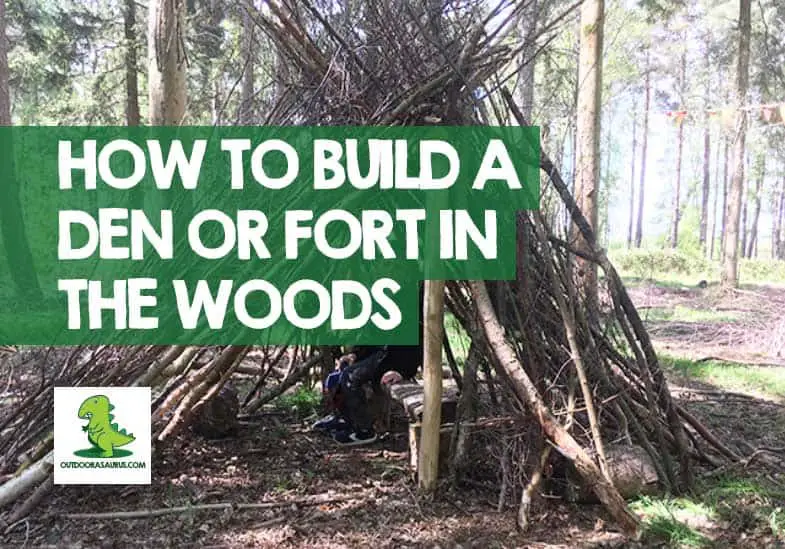
This weekend my son and I went to a forest school club put on by our local authority and learned how to build a fort in the wood with sticks. We made an amazing lean-to den, and you can see some photos of how it turned out lower down the page.
We’d been wanting to build a den in the wild for ages, so it was an amazing day out, and we hope when we go back in a month’s time, our fort will still be there.
Here’s how we built a den in the woods and wild, followed by some alternative children’s outdoor den ideas.
How to build a den in the woods with sticks
For full disclosure, when we arrived at the forest club, they already had the frame in place that I am going to discuss below. Having a frame makes building the forest den or fort so much easier, so if you can, put that together first.
If you can’t build a frame like in this example, scroll down for some different children’s outdoor den ideas that still use a lot of the same methods.
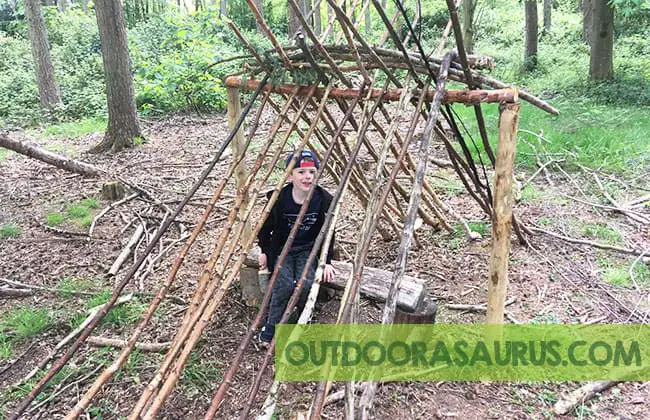
1. Create a frame
Having a wooden frame in place is by far the easiest way you can build a fort in the woods with sticks as it gives you a structure to lay the sticks down onto.
Don’t worry if you can’t create a frame like the one in the photo below, you can use sticks instead.
However, if you do have access to some large wooden posts, bang two into the ground and then nail a top wooden post across them. It should end up looking like a football or soccer goal frame like this.
If you don’t have wooden posts, instead find two larger sticks that have a v-shape at the top of them, and push those into the ground.
I have sketched out below how this can work.
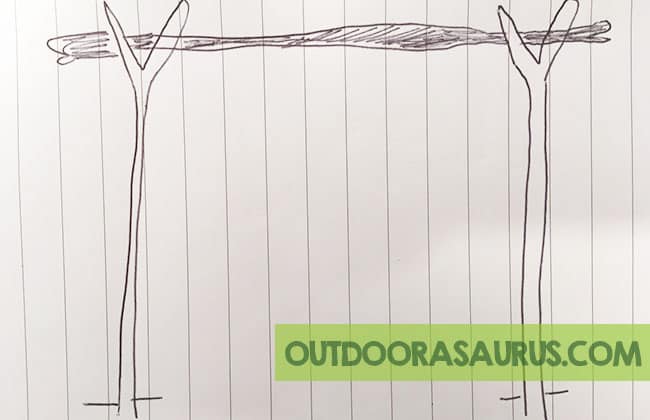
The lay a top wooden stick bar into the v-shapes to create the frame / goal shape as you see in the photo above.
2. Lay sticks at a 45-degree angle
Now your frame is in place, find long sticks that you can lay onto each side of the frame at a 45-degree angle.
These wooden sticks should be as free of foliage and small branches as possible, as your kids will be under this structure eventually, so we don’t want any branches poking into the den.
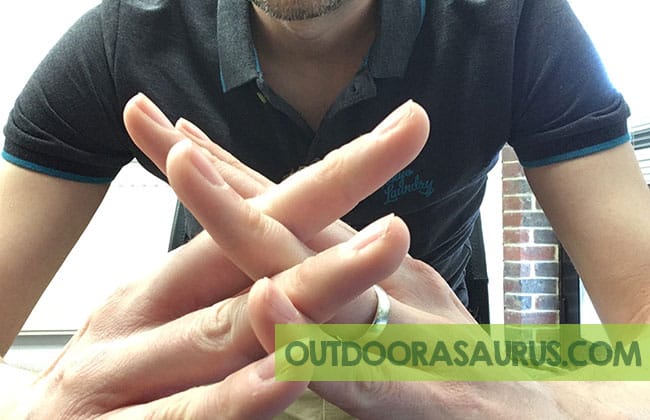
With the laying down, the trick here is to keep switching from one side to another.
What I mean by that is that you lay one stick at a 45-degree angle on one side of the frame, and then move around the other side, and lay another next to it.
This means that where the sticks meet on the top of the frame, they are laid alternatively to each other, kind of locking into place the more you place down.
The best way I can describe this is by showing you this photo of my fingers below. This is how the sticks should be alternated at the top of the fort or den.
-
Layer more sticks on top which have foliage on
Now that you have the basic frame and roof structure in place, you can make the fort or den even darker inside, plus offer it a small element of protection from the elements.
Your den should look something like this at the moment:

All you do is repeat the step 2 process of the den-building, but instead of using sticks free from foliage and branches, you now use ones that have some greenery on them.
By layering these down over your wooden stick frame, you can bulk the top of the fort up, and make sure that any gaps are filled.
Your outdoor wooden fort should end up looking something like this.
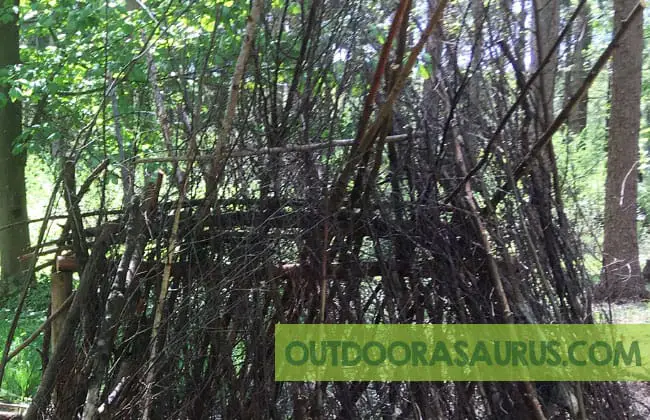
4. Block one side up with leafy sticks
To make the forest den even more fort-like, we ended up blocking up one entrance with smaller leafy sticks.
The kids loved to just have one entrance as it meant their imagination could go wild a bit more, and it was more “secretive” this way.
5. Create your own flag
We then cut some old canvas into a flag shape and used some watery plant stems to create a pattern on it.
It’s really easy to do.
If you cut some light-coloured canvas (like an old t-shirt), you can place flowers and plants into it, and fold the canvas over. You can hit the canvas with a camping mallet, which makes the green and flower colours seep out into the material.
The flag (which unfortunately I don’t have a photo of) was the last part to make their forest den more like a fort.
I then left them all for an hour and had some peace and quiet as I retired to the tent to make up some dinner for the hungry gang!
More children’s den ideas
When I was writing this short and easy guide on how to how to make a fort outside with wood, I also looked up some other children’s den ideas for the outdoors.
In the next couple of months my son and I will be trying them out and seeing if we can surpass our existing forest den with some different ideas.
Keep coming back to Outdoorasaurus as I will update this article in the coming months.
Conclusion
Knowing how to build a den or fort in the forest woods is one of the easiest things to learn, and one of the most fun things you can do with your kids.
If you have a better way of building a den in the wild out of sticks, I would love to hear of them – and will be more than happy to update this guide with your own inventions!